
When it comes to organizing your life in both the digital and real-world, Evernote is as good as it gets. For anyone just starting or already using Evernote, exploring its world of templates is the best way to get the most out of it. Evernote and its template platform are one of the best reasons to use the app and one of the easiest ways to get organized in a hurry. So how do create a template in Evernote? Let’s take a look at how to take notes and get organized faster with templates.
Also read:5 Tools You Need to Work from Home

Why Should You Use Templates?
Now that you have a solid understanding of how to create, edit and remove templates, it’s important to understand the why. One of Evernote’s biggest advantages is its flexibility. It starts as something of an empty shell that you can mold into any format that will help you be productive. Templates begin by showing you what is possible in Evernote and allow you to open up your mind to creating a design and setup that works for you. The best part is that templates help you free up time for doing the work rather than a constant battle over formatting.
For an organization or a small team, templates can ensure that everyone is on the same page. Do you want everyone to use the same document for quarterly planning? Use a template. How about the same template for tracking expenses? Create a template. What about keeping track of leads? Create a sales contact template? All of these can dramatically help an organization stay on track, keep everyone organized and ensure that more time is spent on doing the actual work rather than organizing it.
The beauty of Evernote and, in particular, its templates is how customizable it can be to your workflow. Some notes apps follow a very linear design where you can only utilize what is pre-developed for use. Evernote allows your mind and your needs to flourish and create exactly what you need. Having that option and those capabilities can make it incredibly valuable to any organization.
How to Create a Template
Do you have a note you want to turn into a template for future use? It’s incredibly easy to create a template in Evernote, regardless of the platform. The following steps can be followed for macOS, Windows, iOS, and iPadOS, and Android, as well as Evernote.com on the Web.
1. Start by creating the note you want to use as a template. It can include anything you want, as there are very few limitations to what you can set as a template for future use.
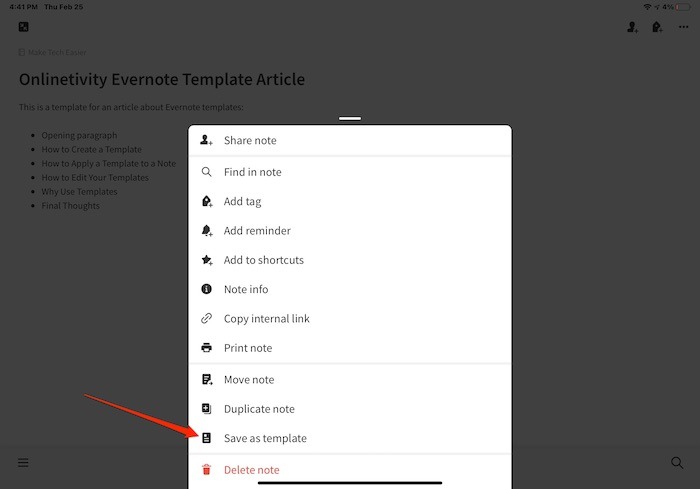
2. Once you have completed your template setup, click on “More Actions” or the three dots in the upper-right corner.
3. Locate “Save as template” and assign a title. After you have typed the title, click on “Save.”
You have now created an Evernote template that can be utilized in the future.
How to Apply a Template to a Note
After you create a template in Evernote, or multiple templates, it can be applied immediately.
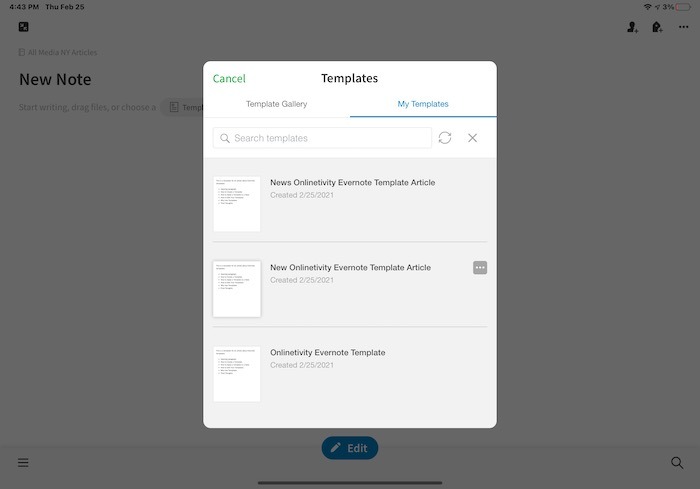
1. Begin by creating a new note, then click or tap on “Template” in the note body.
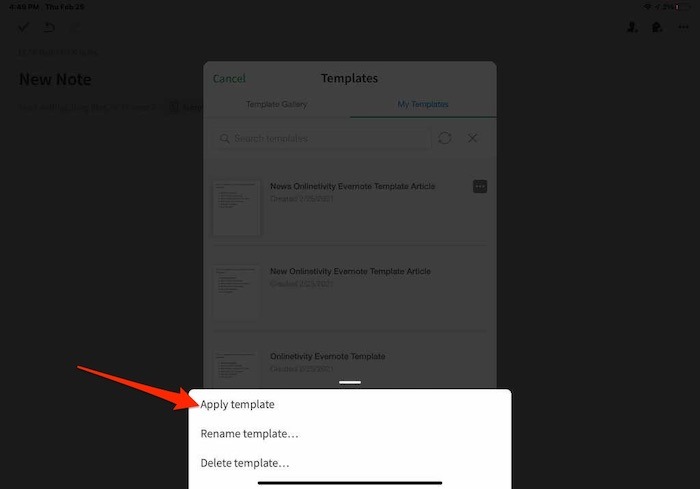
2. Select the template from the Template Gallery or from any of your saved templates that would have been created using the steps above, and it will be added to your new note. Alternatively, click or tap on Options or the three-dot menu, then on “Apply Template,” and it will will be added to your new note.
3. You can now edit the note as you normally would.
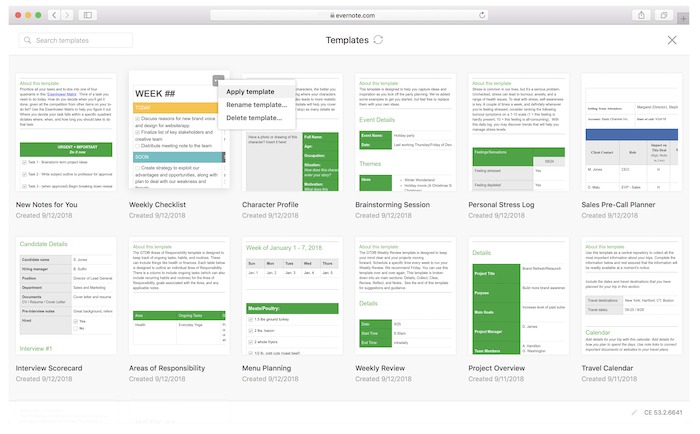
How to Edit Your Templates
If you have already created a template but want to make either a quick change or more extensive edit, you need to start by making changes to the existing template. Having made all of the changes, save it as a new template with a new name/title. You now need to remove the old version from your template library.
1. macOS/Windows/Web: Create a new note and click on “Template” in the note body.
2. Hover your mouse icon over any existing template so the Options or three-dot menu appears.
3. Click on “Apply Template” and make the changes.
4. Click on “Save as Template”.
5. Create a new note and click on the Template within the body.
6. Select the old Template.
7. Click on Options or the three-date menu and choose “Delete Template”.
Final Thoughts
While numerous competitors have stepped up to challenge Evernote in recent years, it still sets the bar for a tool that can be shaped to your will. Templates provide so much opportunity and capability within the application that there is almost an endless amount of ways to use Evernote. It’s that thought that makes it so invaluable for so many organizations and help to find its way to better productivity.
Image Credit: Evenrote