
If you are a project manager or often find yourself managing complex projects, you should have a project management tool. With a good project management tool, you’ll be able to plan and schedule tasks effectively. Apart from scheduling tasks, project management tools help with budgeting, quality assurance and the documentation of projects.
One of the most popular project management tools currently is Microsoft Project Management. Originally an idea that was formed in the 1980s by Ron Bredehoeft, Microsoft Project has evolved over time to be the second leading project management tool today. Follow along with this guide to learn about Microsoft Project and how to use it.
Major Features of Microsoft Project

Multiple Views in One
One feature of the Microsoft Project tool is its presentation of multiple perspectives of data in a single view. This makes comparison and data analyses very easy. For instance, with the tool, you can have a graph, a pie chart, and a figure table presented to you in one view. Also, you can have charts for different types of data in a single view.
File Sharing
With Microsoft Project, you can share files with your team members either by granting view or edit access. With the edit option, individuals privy to a document can collaborate on it at the same time. The best part is that everyone gets to see what everybody is doing in real-time. As the project manager, you can quickly correct any errors.
Planning and Scheduling
This feature is used to create the tasks to be completed and the order in which the tasks should be completed. Also, it helps to assign tasks and allocate resources to various team members. This feature can be divided into three parts – prioritization, task management, and team calendar. .

Reporting
The reporting feature allows you to create reports on the progress of the project, and this can be extracted in .pdf or Excel format. The types of reports you can generate include tasks completed, tasks outstanding, budget, etc. This data could be filed against the timeline for the project completion.
Project Timeline View
The project timeline view presents a complete picture of the project from start date to expected end date. The view contains tasks to be completed at various stages of the project and the resources responsible for delivery.
Resource Management
This feature helps you to manage your resources, like funds, time, raw materials, and others. It also shows all the potential ways resources can be utilized. With this feature, you’ll learn whether resources are properly utilized, underutilized, or overutilized.
How to Set Up a New Project on Microsoft Project
This tutorial shows how to set up a project.
Setting Up a Project File
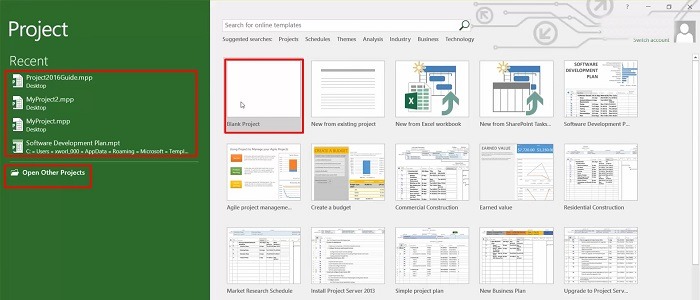
1. Launch the tool from your desktop
2. Select “Blank Project” to get a view of the general workspace which is divided into three sides called Project Timeline, Project Details and Gantt Chart.
3. Look out for the “Project” tab and click on it.
4. Select “Project Information” to input details of the Project Start Date and Project Finish Date.
Inserting Project Tasks and Activities
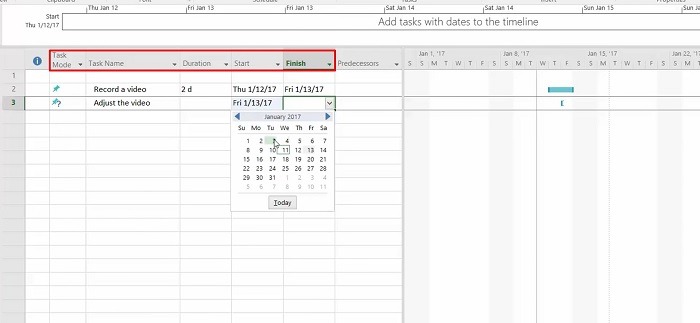
1. In the general space, find the columns named “Task Mode,” “Task Name,” “Duration,” “Start,” “Finish,” and “Predecessors.” Populate the details of your project tasks under these cells and include their start and end dates.
2. On the right, you should see a bar on the Gantt chart which shows the timeline for each task. The Duration of the project tasks is automatically calculated by Microsoft Project once the “Start” and “Finish” dates of the project are populated.
3. You can edit the colors of the bars on your Gantt chart by double-clicking the bar.
4. If you make a mistake while inputting task or project details, simply right-click on the task and select the “Delete” option.
Adding Tasks to a Timeline
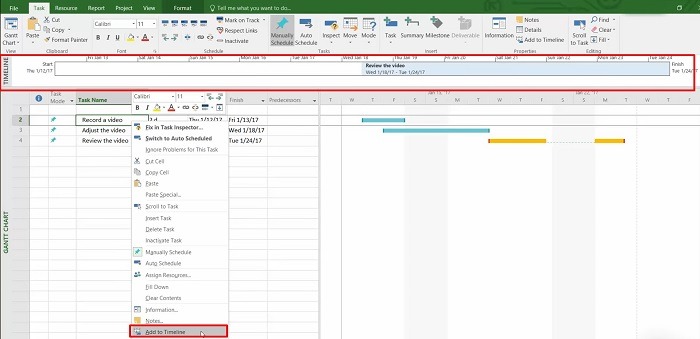
1. Underneath the Ribbon on your Microsoft Project workspace is a bar depicting the Project Timeline. This bar only shows the activities you want it to. To add activities, right-click on the tasks and select “Add to Timeline.”
2. To remove the activity or task, right-click on it in the Timeline and select “Remove from Timeline.”
Checking Information Related to a Task
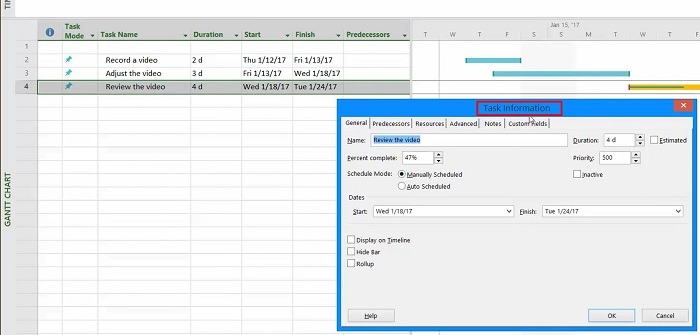
1. To update or check the detailed information of a task, right-click on it to open the task information panel.
2. In the “General” tab, you can adjust the percentage of completion, priority of task, duration and dates.
3. In the “Notes” tab, you can include things you don’t want to forget.
4. In the “Advanced” tab, you can specify the final deadline for tasks.
Including Task Dependencies
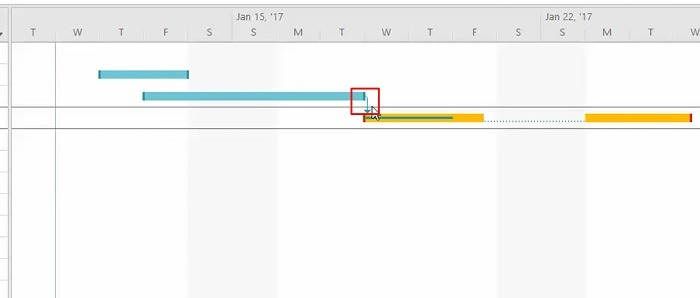
1. If you have tasks that can’t start without another one ending, you can link them.
1. Simply select all the tasks that are dependent by holding the Ctrl + Down keys and selecting the tasks in the correct order. Project will automatically organize your tasks in order, reflecting the dependencies.
Adding Resources
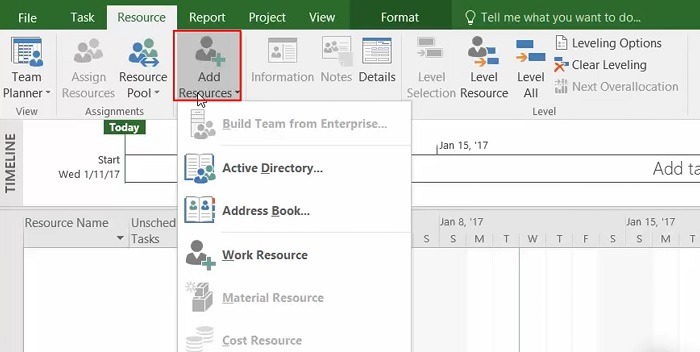
1. To assign members of your team to the task, click on “Team Planner” on the bottom right of your screen.
2. Move your cursor to the Office Ribbon and locate the “Resource” tab.
3. You can choose to add resources from your “Address Book” or do so manually by choosing “Work Resource.”
4. Once you’re done selecting the preferred source, double-click Resource to input name, email, availability and working time.
5. Click “OK” to apply the changes.
Conclusion
The features of the Microsoft Project tool make the process of project management easy, ensuring you are better able to manage your activities, resources and time for improved productivity. Read on to learn how to improve your calendar management.